Below you will find a brief walk-through guide to submitting payments in the new system.
Step 1
When viewing the “Finances” tab –> the “Balance” link has a new block that appears to allow for a payment to be made. An amount is keyed into the text box and the button “Make a Payment” is clicked to start the process. There is a term box that should be preselected with the only available option.
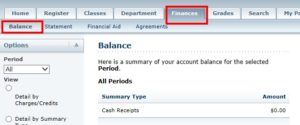
The payment box is on the bottom left of the page.

Step 2
A new window pops up in an iFrame. If you use Safari browser, please see this link for important information about cookies, as a setting will interfere with the ability to display the form correctly by default. On the first screen in the iFrame, a brief bit of information, such as the student name, is asked to be keyed into the available fields. You may have to scroll the iFrame around to see it all.

Step 3
Payment Information will be submitted on a form on the resulting page.

Step 4
A verification screen is presented before the card is charged to ensure all details are accurate.

Step 5
The CASHNet receipt is presented, copies may be emailed to anyone appropriate. A link to return to PowerCAMPUS (Self-Service) is presented.

Step 6
A “processing request” screen may appear pending how quickly the person continues to PowerCAMPUS, as CASHNet communicates information back to Self-Service. This usually is only presented for a brief moment and you will be automatically redirected.

Step 7
Person is returned to Self-Service and is presented an option to close the window and return to their main browser session in PowerCAMPUS. The balance information should be updated to reflect the payment.
